The ability to split a data table into multiple data tables is a simple - but also powerful feature. Imagine having a years sales figures - but you want to easily split it down by month, or sales region, sales representative, etc. This feature allows you to easily do just that.
From the Data Table Actions screen - you can choose the Split your in-memory data tables. Once you click the splitter button - you will see the following screen.
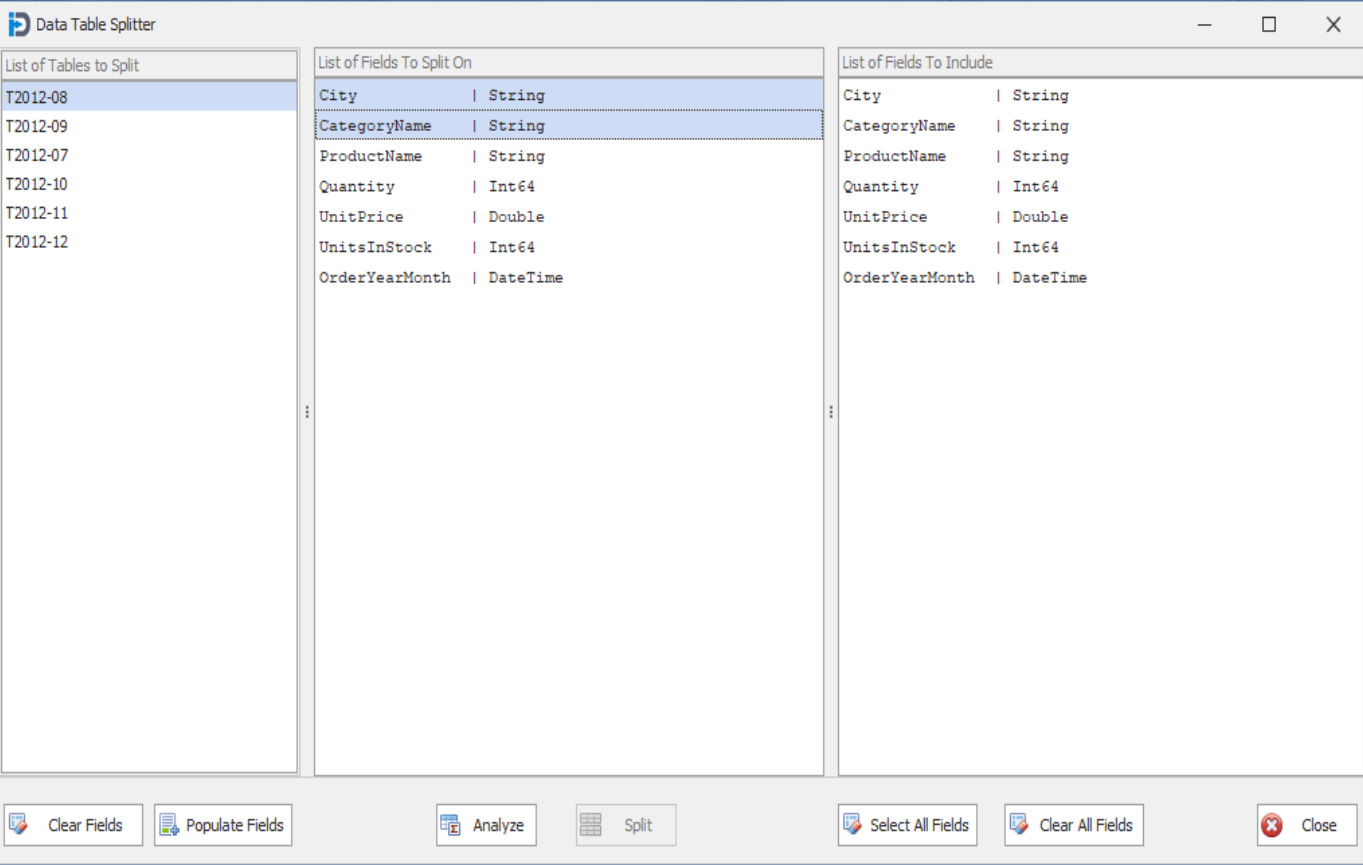
You first need to choose a data table you want to split - and then choose the Populate fields button. This will fill in the data table's columns and their data types into the second and third list boxes on the screen.
In the second list box - you can select the possible breakdowns you want to consider - simply by clicking on the columns you want to use. In the screen shot below, we have chosen the City and CategoryName fields. In the third list box you can choose what columns you want to include in the resulting tables created by the splitting process. If you do not choose any of them - then they will ALL be included in the resulting tables.
Once you have your fields selected - you can click the Analyze button in the bottom middle of the screen.
When you click the Analyze button - the following screen appears. It shows you the total number of possible splits based on the fields you have chosen. If you look at the first row in the grid below - you can see that the combination of Albuquerque and Beverages has a total of 12 records that will be put into a separate table if you choose to move ahead with the split.
In our example shown here - we have selected the top 4 rows.
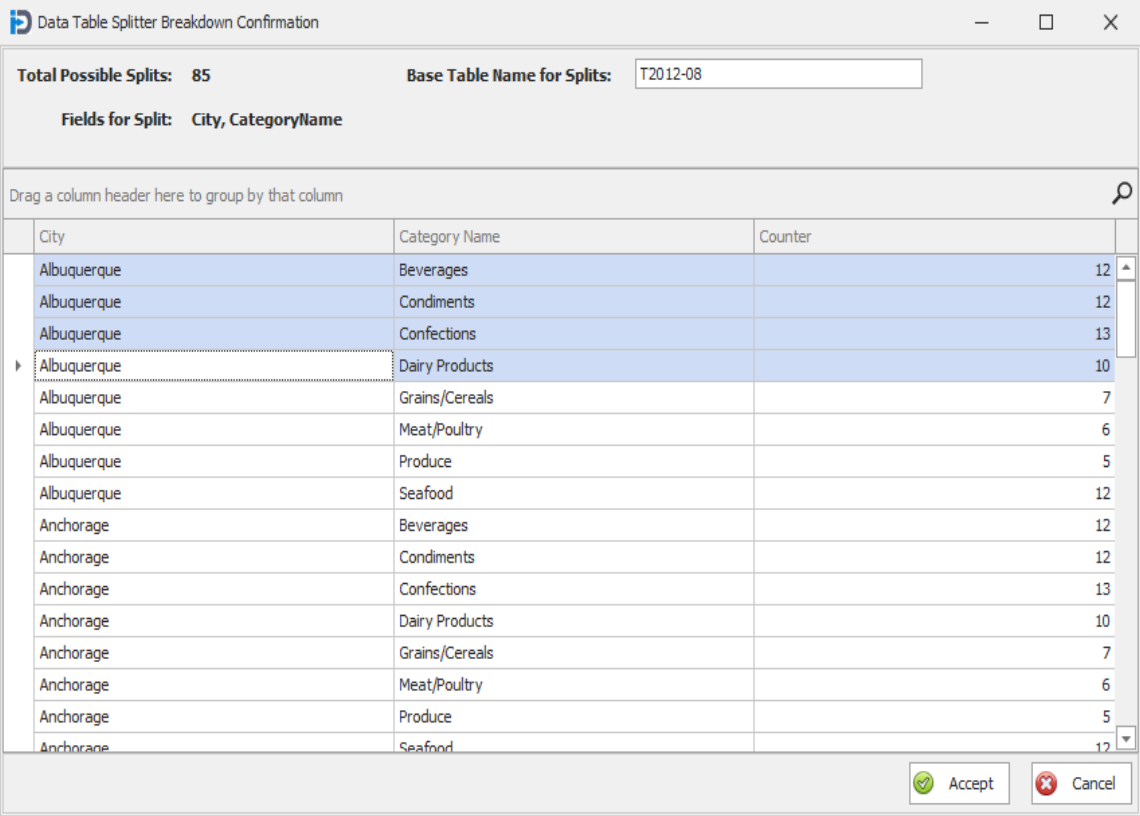
When you click the Accept button - you will be asked to confirm you choices. In this case we have selected 4 rows - so we will break the data down into 4 separate data tables.
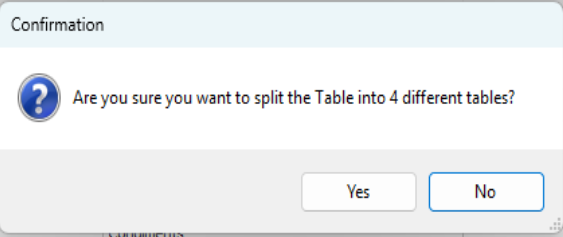
Once the above confirmation is completed - you can then click on the Split button. This will perform the actual splitting of the data - based on the choices you have selected. The follow message box will be shown upon completion of the splitting process.
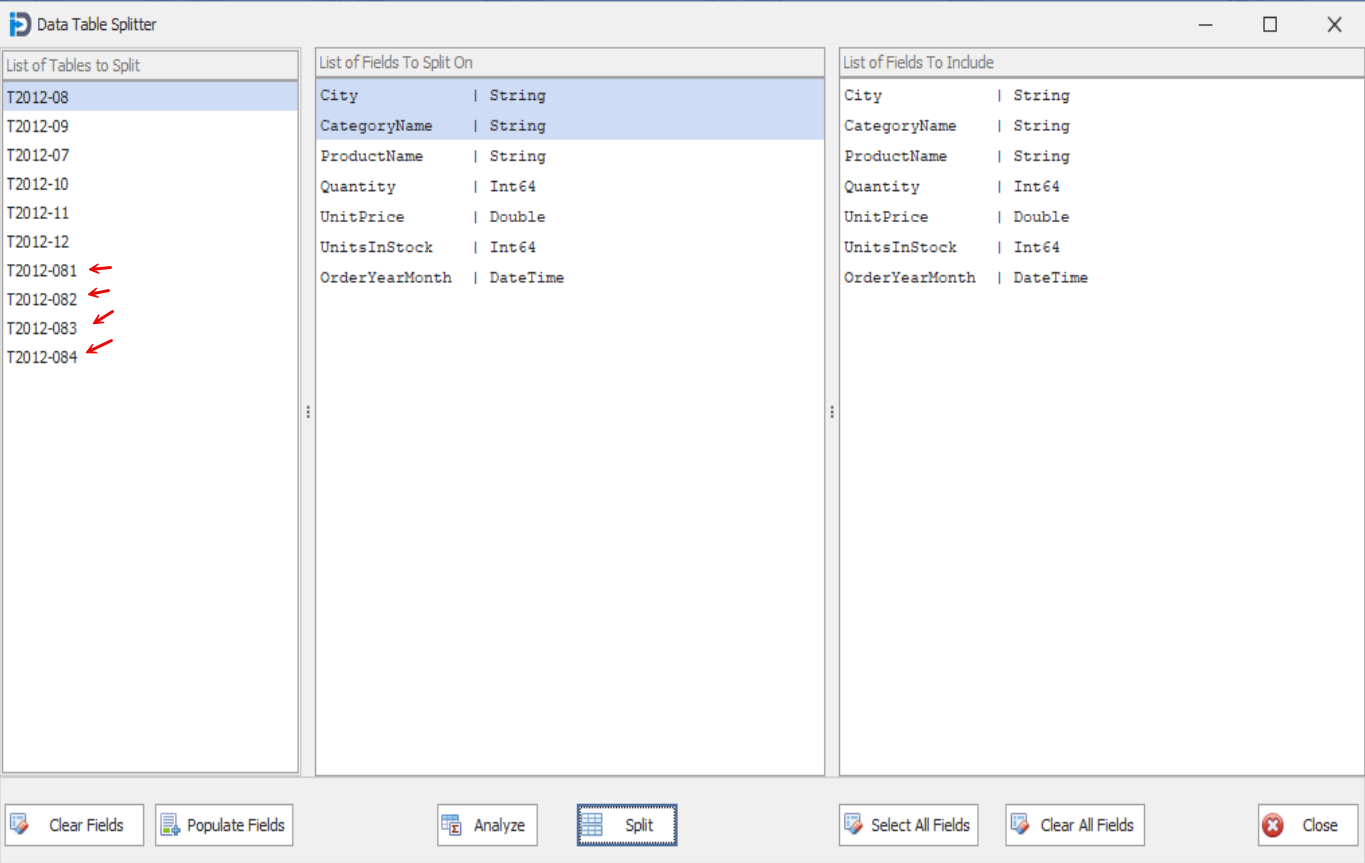
When you go back to the Splitter screen - you will see the new data tables already shown in the list box on the left of the screen.
You can now click the Close button to exit the splitting process.